Raspberry Pi Home Theater Setup
The Raspberry Pi is great for playing videos and music from USB devices, but what if you want to use it as a wireless media client? This is the guide to creating a streaming home theater setup using XBMC on the Pi.
The plan
If your media is scattered around your home network (like mine is), the idea is to use XBMC on the Raspberry Pi as a central hub to access all that content. This involves setting up file servers (NFS, Samba, UPnP) on your local computers and configuring XBMC.

Streaming caveats
Since all media content will be streamed, it's important to make sure your Raspberry Pi is up to the task. If you plan on streaming 1080p DTS encoded content, you will most likely experience stuttering. Your Raspberry Pi will have no problem decoding the video, but it will struggle mightily with the audio codec. This is because the Pi does not have the proper licensing to perform hardware decoding, so it must rely on software (which is just plain slow).
So how do we get around this? The best solution is to employ audio passthrough (more on this later). This requires having a TV or external AV receiver capable of DTS decoding.
If you don't have hardware with this functionality, there is an alternative solution, but it's not pretty. You can use a local computer as an on-the-fly transcoder to convert DTS audio streams to AAC or stereo. If you choose to go this route, you can use Plex Media Server for transcoding. On the Raspberry Pi, you will have to configure XBMC to be compatible with Plex streams or install a Plex distribution.
Networking protocol
There are several networking protocols we can choose for file sharing. The two most popular are Samba (SMB) and NFS. Samba is designed to work well with Windows and is very easy to use. NFS is not supported natively in Windows, but it provides almost twice the throughput of Samba because of its low overhead. Also, NFS is less CPU intensive than Samba. For these reasons, we'll be using NFS.
XBMC distribution
There are three main XBMC distros for the Raspberry Pi: Raspbmc, OpenELEC, and Xbian. I tried out each of them when I first bought my Raspberry Pi (a year ago) so I'll share my brief thoughts.
Raspbmc: By far the most all-inclusive distro with everything included out of the box. It has a powerful configuration tool, but is a little slow.
OpenELEC: A relatively minimalist distro with a decent configuration tool. The main advantage is that it's fast. Really fast.
Xbian: Bleeding edge distro that's in between Raspbmc and OpenELEC in terms of speed.
With it's incredible speed, OpenELEC provides the smoothest user experience so we'll use that as our OS. If you think there's a better distro out there, let me know in the comments.
Installing and configuring NFS
We'll be setting up an NFS server on OpenSUSE. The instructions should be similar across different Linux distributions.
As superuser, install the server package using zypper in nfs-kernel-server. Optionally, if you would like to configure NFS through YaST, install yast2-nfs-common and yast2-nfs-server.
Edit /etc/exports and add lines corresponding to the directories you would like to export via NFS. Each line should follow the following format:
<directory> <host1>(<options>) [<host2>(<options>)]...
For example,
/home/mdchaudhari/Movies 192.168.0.0/24(ro,all_squash,insecure,anonuid=1000,anongid=100)
The directory (and all subdirectories) to be exported is /home/mdchaudhari/Movies. All hosts within the range 192.168.0.1 to 192.168.0.254 will have read only access. The insecure option allows XBMC to run without root privileges. The all_squash option converts requests from all users to anonymous uid and gid. To determine the uid and gid corresponding to a particular user, run grep <username> /etc/passwd.
Hosts can be defined using,
- Single IP address (192.168.0.5)
- Hostname (mdc.mdczone)
- Fully qualified domain name (mdchaudhari.com)
- Wildcards (*.mdchaudhari.com)
- IP networks (192.168.0.0/28)
- NIS netgroup (@mdchaudhari)
To learn more about the host definitions and export options, read the man pages on exports. After modifying /etc/exports, we are left with an insecure setup. To further refine access, /etc/hosts.allow and /etc/hosts.deny should be modified. To implement additional security, consider the different exports options and NFS mounting options (see man pages on nfs). For our simple home network setup, we won't worry about additional security.
NFS and portmapper run on TCP and UDP ports 2049 and 111 respectively. If SuSEfirewall2, iptables, or another firewall is blocking access to these ports, we need to open them. NFS also relies on several daemons to function: rpc.portmap, rpc.nfsd, rpc.lockd, rpc.statd, rpc.mountd, and rpc.rquotad. Luckily, most Linux distros contain startup scripts for all these daemons.
Now, we're ready to start the NFS server. Run systemctl start rpcbind.service and then systemctl start nfsserver.service. You can check the NFS server status by running systemctl status nfsserver.service.
nfsserver.service - LSB: Start the kernel based NFS daemon
   Loaded: loaded (/etc/init.d/nfsserver)
   Active: active (running) since Thu 2014-03-19 14:09:29 PDT; 2min 42s ago
  Process: 23131 ExecStop=/etc/init.d/nfsserver stop (code=exited, status=0/SUCCESS)
  Process: 23155 ExecStart=/etc/init.d/nfsserver start (code=exited, status=0/SUCCESS)
   CGroup: /system.slice/nfsserver.service
           ├─23176 /usr/sbin/rpc.idmapd -p /var/lib/nfs/rpc_pipefs
           ├─23180 /usr/sbin/rpc.mountd
           └─23183 /usr/sbin/rpc.statd --no-notify
Ensure all the NFS daemons are running using rpcinfo -p.
program vers proto   port  service
 100000    4   tcp    111  portmapper
 100000    3   tcp    111  portmapper
 100000    2   tcp    111  portmapper
 100000    4   udp    111  portmapper
 100000    3   udp    111  portmapper
 100000    2   udp    111  portmapper
 100005    1   udp  20048  mountd
 100005    1   tcp  20048  mountd
 100005    2   udp  20048  mountd
 100005    2   tcp  20048  mountd
 100005    3   udp  20048  mountd
 100005    3   tcp  20048  mountd
 100024    1   udp  37615  status
 100024    1   tcp  43565  status
 100003    2   tcp   2049  nfs
 100003    3   tcp   2049  nfs
 100003    4   tcp   2049  nfs
 100227    2   tcp   2049  nfs_acl
 100227    3   tcp   2049  nfs_acl
 100003    2   udp   2049  nfs
 100003    3   udp   2049  nfs
 100003    4   udp   2049  nfs
 100227    2   udp   2049  nfs_acl
 100227    3   udp   2049  nfs_acl
 100021    1   udp  49172  nlockmgr
 100021    3   udp  49172  nlockmgr
 100021    4   udp  49172  nlockmgr
 100021    1   tcp  59170  nlockmgr
 100021    3   tcp  59170  nlockmgr
 100021    4   tcp  59170  nlockmgr
Installing OpenELEC
We won't be installing OpenELEC directly. Instead, we'll use BerryBoot because it's simpler and includes a bootloader if you want to install multiple distros. Download the BerryBoot zip file from here.
Next, pop your SD card into your computer. We'll need to delete all existing partitions and create a new FAT partition. As superuser, run fdisk -l to determine which device corresponds to your SD card.
Disk /dev/sdc: 16.0 GB, 16039018496 bytes, 31326208 sectors
Units = sectors of 1 * 512 = 512 bytes
Sector size (logical/physical): 512 bytes / 512 bytes
I/O size (minimum/optimal): 512 bytes / 512 bytes
Disk label type: dos
Disk identifier: 0x00085c58

Device    Boot      Start         End      Blocks   Id  System
/dev/sdc1   *        2048      258047      128000    c  W95 FAT32 (LBA)
/dev/sdc2          258048    31293439    15517696   83  Linux
In my case, that's /dev/sdc. Enter command mode by running fdisk /dev/sdc where /dev/sdc should be adjusted to correspond to your particular device.
Delete all existing partitions (/dev/sdc1 and /dev/sdc2) using the d command. Ensure that all partitions are wiped using the p command.
Disk /dev/sdc: 16.0 GB, 16039018496 bytes, 31326208 sectors
Units = sectors of 1 * 512 = 512 bytes
Sector size (logical/physical): 512 bytes / 512 bytes
I/O size (minimum/optimal): 512 bytes / 512 bytes
Disk label type: dos
Disk identifier: 0x00085c58

Device    Boot      Start         End      Blocks   Id  System
Now, we will create a new FAT partition. Using the n command, create a primary partition. Set the partition number as 1, leave the first sector as default, and set the last sector as +100M to create a 100MB partition. We need to change the partition type to FAT32 so run the t command and use hex code c. Print the partition table to make sure the changes are correct.
Partition 1 of type Linux and of size 100 MiB is set
Changed type of partition 'Linux' to 'W95 FAT32 (LBA)'

Disk /dev/sdc: 16.0 GB, 16039018496 bytes, 31326208 sectors
Units = sectors of 1 * 512 = 512 bytes
Sector size (logical/physical): 512 bytes / 512 bytes
I/O size (minimum/optimal): 512 bytes / 512 bytes
Disk label type: dos
Disk identifier: 0x00085c58

Device    Boot      Start         End      Blocks   Id  System
/dev/sdc1            2048      206847      102400   83  W95 FAT32 (LBA)
We're satisfied with all the changes we've made so we'll use the w command to write the changes to disk.
Next, we have to format the partition. Run mkfs.vfat -F 32 -s 2 /dev/sdc1 where /dev/sdc1 should correspond to the partition you created using fdisk.
Now, we can copy all of the extracted BerryBoot files onto our newly created FAT partition. Once that's done, power up your Raspberry Pi with your inserted SD card. Follow the instructions on the BerryBoot website to install OpenELEC.
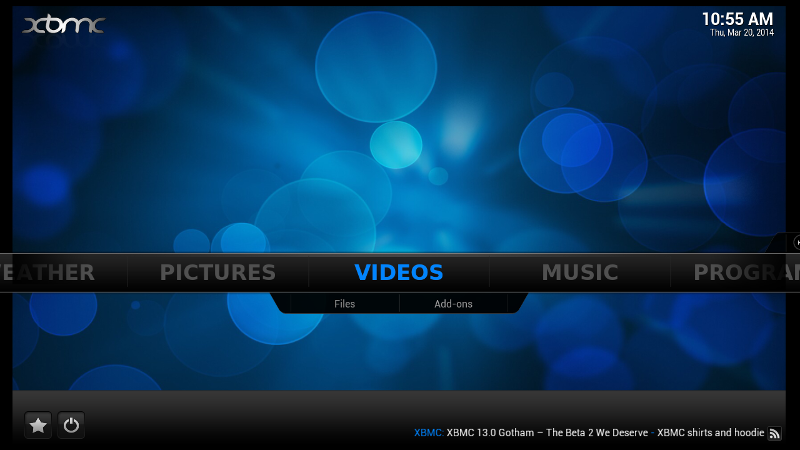
Once the installation is complete, we can boot into OpenELEC and see the Confluence home screen.
The first thing we need to do is enable SSH access. Navigate to System → OpenELEC → Services and enable 'Start SSH server at boot'. Then, reboot the Raspberry Pi and SSH into OpenELEC.
Login: root
Password: openelec
In the /storage/.config/ directory, create an autostart script named autostart.sh. In this file, we will mount our NFS share at bootup.
#!/bin/sh
(sleep 10; \
mount -t nfs 192.168.0.12:/home/mdchaudhari/Movies /storage/Movies/
\
)&
Make the autostart script executable and run it. You can cat /proc/mounts to make sure the mount worked.
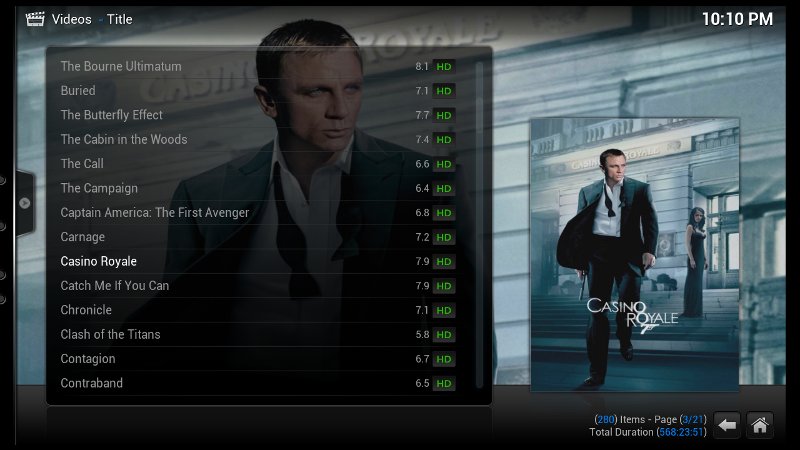
Now we can add our mounted path as a video file directory inside XBMC. Once that's done, XBMC should start fetching our content.
Several minutes later, our entire library is synced.
Configuring OpenELEC
If you want to tune OpenELEC to improve performance, there are several changes we can make.
Overclocking
The biggest performance improvement can be realized by overclocking. The default options are:
arm_freq=700
gpu_freq=250
avoid_pwm_pll=0
sdram_freq=400
over_voltage=0 (1.2 V)
force_turbo=0
initial_turbo=0
arm_freq_min=700
core_freq_min=250
sdram_freq_min=400
over_voltage_min=0 (1.2 V)
temp_limit=85
To change them, reboot your Raspberry Pi. From the BerryBoot menu, navigate to Edit Menu → Edit Config → config.txt. At the end of this file, we will add our modest overclock settings.
arm_freq=800
gpu_freq=300
Exit the Bootmenu Editor and boot into OpenELEC. To check our CPU frequency, we can cat our CPU devices.
cat /sys/devices/system/cpu/cpu0/cpufreq/cpuinfo_max_freq
cat /sys/devices/system/cpu/cpu0/cpufreq/cpuinfo_min_freq
cat /sys/devices/system/cpu/cpu0/cpufreq/cpuinfo_cur_freq
To find out more about overclocking the Raspberry Pi, check out RPiconfig. It should be noted that certain settings, such as overvoltage, will void your warranty. Aggressive overclocking will require a heat sink. Finally, Class 6 & 10 SD cards may become corrupted.
Tuning NFS
We can tweak our NFS performance by changing the way we mount our NFS share in the autostart.sh script.
We can mount our directory using NFSv3 over UDP. We can also specify the timeout value as well as the maximum read data block size.
mount -t nfs 192.168.0.12:/home/mdchaudhari/Movies /storage/Movies/ -o udp,ro,timeo=600,rsize=65556,nfsvers=3,soft
Setting a static IP
Creating a static IP address for the Raspberry Pi will not improve performance, but it's useful if you plan on using the Pi as a server or using the XBMC web interface.
The first thing we need to do is identify the DHCP pool range of our router. Log into your router's administration web page and find the DHCP Server Settings.
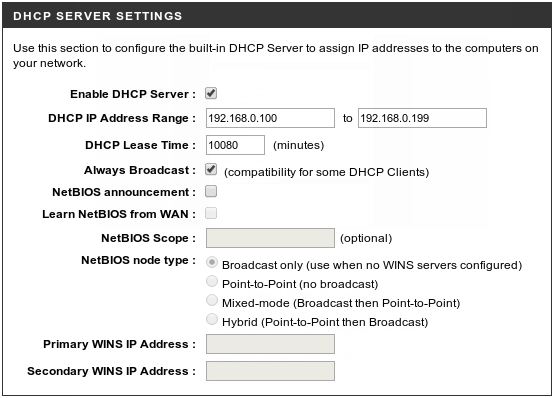
We see that IPs ranging from 192.168.0.100 – 192.168.0.199 are automatically assigned by DHCP. That means we must choose an IP that falls outside this range.
In OpenELEC, navigate to System → OpenELEC → Network → Static IP Address. Assign a static IP outside of the DHCP pool. Also enter your default gateway and DNS server, both of which should be your router IP address. Reboot the Raspberry Pi for the changes to take effect.
Configuring XBMC
At this point, you can go ahead and enjoy your Raspberry Pi. But if you would like even more speed improvements and additional XBMC functionality, read on.
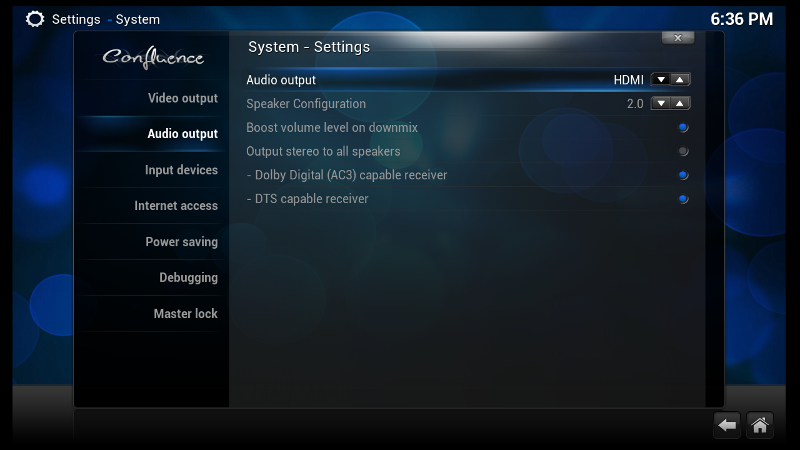
Audio Passthrough
If you are streaming HD content with DTS audio, you may experience audio and video stuttering. The solution is to enable audio passthrough so a DTS capable receiver can decode the audio stream.
Navigate to System → Settings → System → Audio output. Ensure that your Audio output is HDMI, and Dolby Digital (AC3) and DTS capable receivers are both selected.
Video and skin settings
We can disable several features to cut down on CPU usage.
Confluence skin settings:
- Disable autoscrolling for plot and review.
- Disable recently added videos and albums.
- Disable fanart.
- Disable now playing video and visualization.
- Disable weather info.
Appearance settings:
- Disable RSS feeds.
- Disable screensaver visualization.
Video settings:
- Disable subtitles.
- Disable extract thumbnails and video information.
Other methods to reduce system load include reducing resolution.
Skin choice can also drastically impact performance. The lightest skins perform the best. These include Quartz, Amber, Metropolis, and Bello. However, the default skin, Confluence, has the best overall performance.
Video buffering
We can also try to increase the buffer cache. In /storage/.xbmc/userdata/ create a file named advancedsettings.xml. We can adjust the video buffer size by specifying cachemembuffersize as well as the rate at which the cache is filled by specifying readbufferfactor.
<advancedsettings>
    <network>
        <cachemembuffersize>268435456</cachemembuffersize>
    </network>
</advancedsettings>
Be careful with the cachemembuffersize you choose. Some people have reported the Raspberry Pi crashes and reboots if the buffer size is too large.
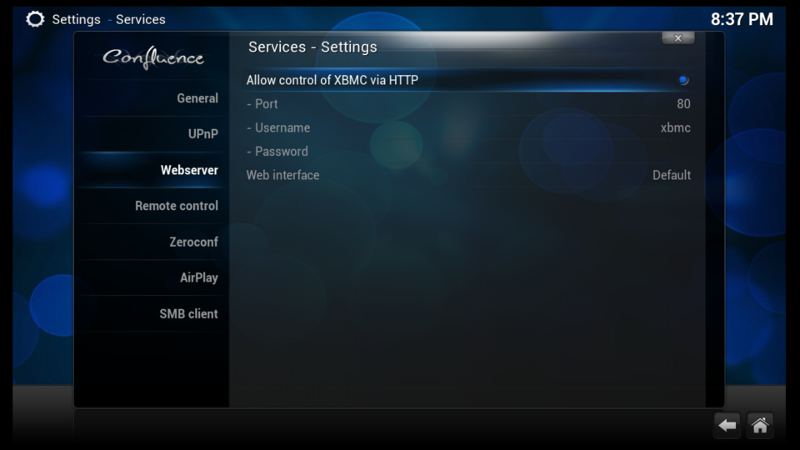
XBMC web setup
To enable the webserver, navigate to System → Settings → Webserver. Enable 'Allow control of XBMC via HTTP'. You can specify your port, username, and password of choice.
Now, we can view our XBMC library and control playback through a web browser.
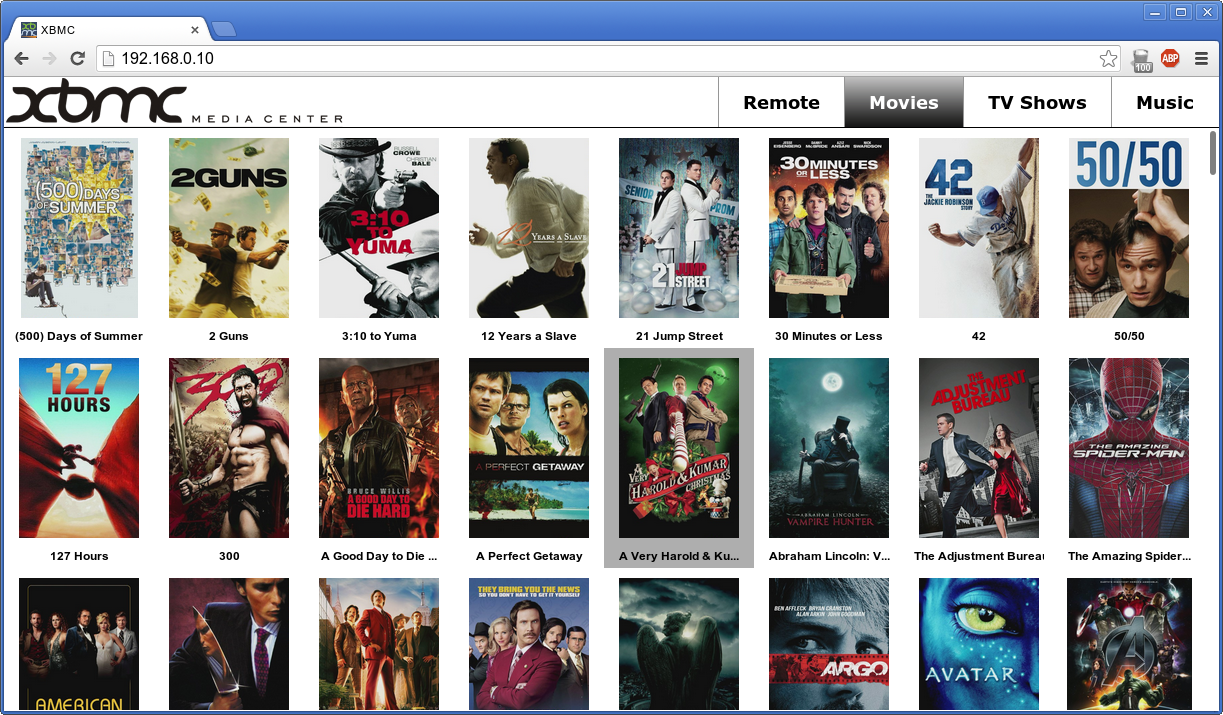
If you have assigned a static IP to your Raspberry Pi, you won't have to worry about dynamic IP changes due to a reset of the router or DHCP lease expiration.
XBMC CEC
OpenELEC has built-in CEC support. On certain TVs, you may have to enable HDMI control. For LG TVs the feature is called SimpLink and for Samsung TVs it's called Anynet+.
To determine which remote keys are detected, enable XBMC debug logging. Then we can run tail -f /storage/.xbmc/temp/xbmc.log | grep OnKey: to identify the valid keys. We can map these keys to XBMC actions by creating remote.xml in /storage/.xbmc/userdata/keymaps/.
Once all of the desired keys are mapped, we can navigate XBMC without the use of a keyboard or mouse.

What's next?
- Investigate if increasing swap space improves performance?
- Fix SimpLink failing to reconnect when switching TV inputs.
- Use Chorus to stream media over LAN with working audio.
- Implement Google Speech API for hands-free control.
- Add a transcoder in front of Chorus/XBMC and build a proper CDN for media.